Note: If there is one thing I have discovered while preparing for this article, there are as many ways to decorate eggs for Easter as there are pictures to draw on paper. I have tried to stick to simple ideas that let your creativity flow. Most of these ideas are based on a concept rather than a project with a specific goal. I hope you enjoy these ideas.
 If you color your eggs year after year, it is easy to get tired of the same old thing. Fortunately there are dozens of different ways to decorate eggs, and do something a bit different and fun this year. I have been all across the Internet to gather these ideas together, I hope you enjoy this list of crazy, fun, and different ways to decorate eggs this year.
The great thing about many of these ideas is that they can be mixed and matched, you can dye eggs and then make them into a parade of different animals, or speckled pre-colored eggs and paint other designs with a paint brush. Have fun, let your love of play take over and you will be surprised at where your creativity takes you.
TIP: Walmart sells fake eggs that you can use for many of these projects, you can also primer large plastic eggs and use them too. The bonus? You can keep them all year around. Here is also a tutorial on how to hollow out eggs so you can keep them as well. http://www.wikihow.com/Blow-Out-Eggs
45 Ways to Decorate Eggs
Chalkboard paint – Craft stores all sell chalkboard paint, which you can paint your eggs with. Once they are painted and have dried have your kids decorate them with colored chalk.
Kids tattoos – This is a very simple way to decorate eggs, simply color eggs like you normally would, and apply your favorite temporary tattoos on them. Temporary tattoos can be purchased in your local dollar store.
Personalized Eggs – Dip eggs into egg coloring sideways, leaving the top third of the egg out of the dye. Let dry and decorate the edge of the dye with dots or dashes and use letter stickers to put names in the undyed oval.
Decorator Tape – There are dozens of different types of decorator tape available on the market such as Washi tape a decorative masking tape. There are also clear tapes as well as duct tape that can be cut into shapes and used on pre-colored eggs.
Doodle Eggs with Permanent markers – Leave your eggs white or brown, or color them first. Then let your kids go to town with permanent markers. Designs, lines, dots, or pictures there is no limit to the things you can do with your markers.
Zentangles – Zentangles are a popular art form and look stunning on white eggs. They are little more than free form doodles but if you need a bit of inspiration head to Pinterest where you will find literally thousands of patterns and ideas. Another idea is to marble color your egg and then zentangle it.
Gel pens– If you happen to have any Gelly gel pens these work very well on eggs. There are several different types for different effects.
Paint eggs with Acrylic Paint – Acrylic paint applied after egg dye can have a dramatic effect. Splashes of paint work well or create a picture if you have the skill.
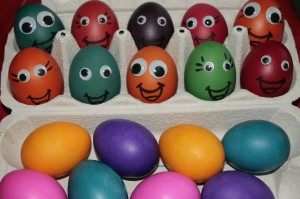
Face Eggs with pens Mustaches and nerd Glasses – Mustaches and nerd glasses are all the rage these days, and are simple to put on your eggs with a sharpie.
Use Stickers – Want something super-fast and simple? Color your eggs as normal, let them dry and put stickers on them. You can opt for Easter stickers or get some pretty dots or other designs to make your eggs really stand out.
Glitter Glue – Elmer’s Glue has a great set of glitter glue in big bottles that makes the perfect decoration for eggs. Dye eggs like normal and simply use the glue to make designs on your eggs. Do one half of the egg at a time and let dry.
Glitter Eggs – Glitter eggs are very easy to make and look spectacular. Simply use Elmer’s glue and a paint brush to spread glue on the egg. Then roll egg in glitter. Let dry and touch up the spots that did not get glitter. You can also make designs with the glue and sprinkle glitter on them. Color eggs first and use coordinating colors of glitter for an elegant looking egg.
Speckled Eggs – With a bit of paint and paint brush or tooth brush you can have a great time with your kids making Easter eggs. You can opt to color your eggs first or leave them natural, simply dip brushes into acrylic paint, dab to wipe off excess paint and spatter eggs. You might want to protect work surfaces well and wear old clothes this method is messy but fun!
Sponge Paint Eggs – Start with colored or natural eggs. Pour acrylic paint in shallow wide bowls and cut sponges into shapes or small squares. Add a bit of water to acrylic paint and dip sponge in the paint. Squeeze out most of the excess paint and carefully dab the egg with it. Try sponges on newsprint a few times to get the right amount of paint and pressure to use before using it on the eggs.
Decorate Eggs With Colored Foam – Have fun decorating eggs with colored foam, make bunnies, chicks and a parade of other animals.
Make Yellow Funny Happy Faces – This is a lot of fun and very simple. Paint eggs a bright cheerful yellow, and let dry. Use a sharpie to make smiley faces and any other sort of happy or funny faces on the eggs.
Foil Eggs – These foil eggs are stunning, and easy to do. http://www.marthastewart.com/1056826/foiled-eggs?czone=holiday%2Feaster-center%2Feaster-everything-eggs&gallery=275369&slide=1056826¢er=276968
Lace eggs – Lace eggs have a delicate look to them that is perfect for any occasion. http://www.marthastewart.com/264362/lace-eggs?czone=holiday%2Feaster-center%2Feaster-everything-eggs&gallery=275369&slide=264362¢er=276968
 Marbelized Eggs – http://www.marthastewart.com/921623/how-make-marbleized-easter-eggs#186640
Striped drizzled eggs with rubber cement – http://www.bhg.com/holidays/easter/eggs/quick-and-easy-easter-egg-decorations/
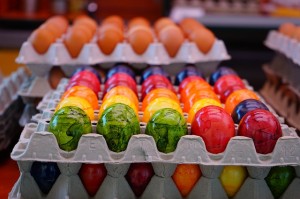
Color eggs with natural dyes – There are beautiful natural dyes all around you that make the most rustic but lovely eggs. This technique can be used with many of the other techniques above or on its own. You can find instructions as well as a list of different dyes here http://chemistry.about.com/od/holidayhowtos/a/eastereggdyes.htm
Metallic Pens to Create Designs – This is another technique that can create beautiful stunning eggs easily. All you need is to dye your eggs like normal and find some metallic markers at your local craft store or Walmart. You will want paint pens or sharpies, the water color markers will not put down enough color to make these eggs stand out. Now just color like normal, let dry completely, and draw your designs on your eggs. Stunning!!
Puff Paint – Same as with the metallic pens, dye and then use puff paint to decorate.
Fabric Textured Eggs – Wrap Easter eggs in textured fabric such as lace, cheesecloth, or netting. You must wrap tightly, twist close and secure with a rubber band. Then dip egg in dye. That is all there is to it!
Tie Dyed Easter Eggs – These eggs are so easy and so much fun, simply get a paper towel moist with vinegar and wrap it around your egg. You may want to purchase some thinner towels for this, the thick towels do not work as well. Take food coloring and press tips to the paper towel. Use no more than 3 colors at a time. Let covered eggs sit for a bit and then remove the towel.
Black paint splattered eggs – If you are looking for something dramatic and funky this might do the trick. This is just like splattering the eggs but in this case you will use white uncolored eggs and splatter them with black paint.
Shape Silhouettes – Put stickers of any shape you want on your eggs. Color eggs and remove stickers.
Watercolor Eggs – This technique gives you a chance to let your little artists show their stuff. This works best with a set of student water color tubes, just add a small amount of water, and let your kids have fun. You can also give your kids some stencils to use for painting shapes and more.
Bubble Wrap Eggs – This technique is easy and a lot of fun for kids and parents alike. Paint the bubble side of a piece of bubble wrap and roll over it with your eggs. You can dye eggs beforehand and you can use more than one color by letting the paint dry in between coats.
Tissue Paper Eggs – To do this you will need some watered down Elmer’s glue or Modge Podge, tissue paper, some water and a paint brush. A soda bottle cap is a good place to set the egg once you are done decorating it. Wet the egg and then put the tissue paper on it, in whatever designs you want. Let dry until the egg is not dripping and is slightly damp. Coat with Modge Podge.
Decoupaged Eggs – this is similar to the above technique except that you will be finding paper, dried flowers, and any other items you may want to decorate your item with. In this case dye your eggs first and then apply Modge Podge to the eggs before applying your decorations. Once eggs are dry, apply another coat of Modge Podge to protect your designs.
Crayola Markers – Crayola Markers are water based and have a sheer appearance that looks great on eggs. You can also get a Crayola Marker Airbrush set That will airbrush the eggs. This is a great alternative to dye, and you can also use stencils to airbrush designs on your eggs.
Melted Crayon Eggs – If your child has a box full of old crayons and what child doesn’t you can use this method for a fun and unique way to decorate your eggs. http://www.sasinteriors.net/2014/03/creating-colorful-easter-eggs-with-melted-crayons/
Napkin Decoupage Eggs – Another decoupage technique, this one is for moms looking for great ways to decorate their Easter table. Take pretty napkin prints and apply them to a damp egg, let dry until the napkins are just damp and still sticking to the egg. Use Modge Podge to cover them.
Pressed flowers Eggs – these have a rustic old feel to them that makes them great to use as a centerpiece or to decorate with. Don’t forget if you want to save your eggs after you put so much work into them, use the tutorial above to blow out your eggs beforehand. -http://www.themagiconions.com/2010/03/decorate-easter-egg-with-pressed.html
Bumblebee Eggs – These eggs are just plain adorable, the tutorial for them is here – http://homemadeserenity.blogspot.com/2011/03/make-it-egg-bumble-bees.html
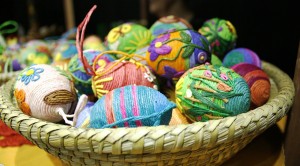
 Using Colorful Yarn to Cover Eggs – If you happen to have any yarn scraps laying around this can be a fun and pretty way to decorate eggs and make a great centerpiece. Simply paint egg with watered down Elmer’s glue a bit at a time and lay the yarn in strips around the egg until the egg is completely covered. You can also add a wide assortment of other embellishments such as ribbons and flowers to complete the look.
Marbled eggs With Shaving Foam – This is a different type of marbling that has a very unique look. Step by step tutorial is right here http://paintcutpaste.com/?s=marbled+easter+eggs
Poured paint Easter eggs – These eggs are a crazy mix of colors you pour over the top. The tutorial was done using plastic eggs but you can actually use hollowed out or hard boiled eggs as well. http://www.pinkandgreenmama.blogspot.com/2013/03/poured-paint-easter-eggs.html
Scratched Eggs – The scratch technique is similar to the same type of art most of us did as a kid, where the eggs are coated in a riot of colors and then have a black layer put over the color. Then kids simply scratch designs in the eggs so that the color shows through. The tutorial is here http://www.blogmemom.com/easter-egg-ideas/
Elegant silhouette eggs – These eggs are very simple and you probably have everything you need at home to make them. But they are beautifully elegant and make a wonderful addition to the Easter table. http://www.rookno17.com/2012/03/easy-silhouette-easter-eggs.html
Aluminum Foil eggs – The aluminum foil technique is also very simple, if you have aluminum foil and paint you have everything you need for these simple eggs. http://spoonful.com/crafts/egg-dyeing-aluminum-foil-technique
Dragons Eggs – This technique is one of my favorites, but only make a few of them because these eggs look their prettiest after they are peeled and they won’t last very long!! http://www.craftjr.com/crafting-with-food-cracked-dyed-dragon-eggsdinosaur-eggs/
Googly Eye Faces – This technique is just plain silly. Color or paint your egg however you want and glue a set of googly eyes on your eggs. Add a mustache, glasses made from foam or any other features you want to your eggs.
Painted String – The painted string technique has been around for a long time, but has not been used as much in recent years since egg dye kits have become so prolific. You need acrylic or water color paints and some string. Dip string in paint and let the excess paint drip off. Drag string across egg to make different patterns. Let egg dry between colors.

Leave a Reply