I love cross stitch. Maybe it spawns from an interest in old-fashioned skills and needlwork, or maybe it’s because I have so many fond memories of watching my mother sit in her comfy rocking chair in the evenings, working on some needlework craft or other. Either way, I have a deep love of cross stitch, and I wanted to share with you a brief tutorial on this old-fashioned hobby!
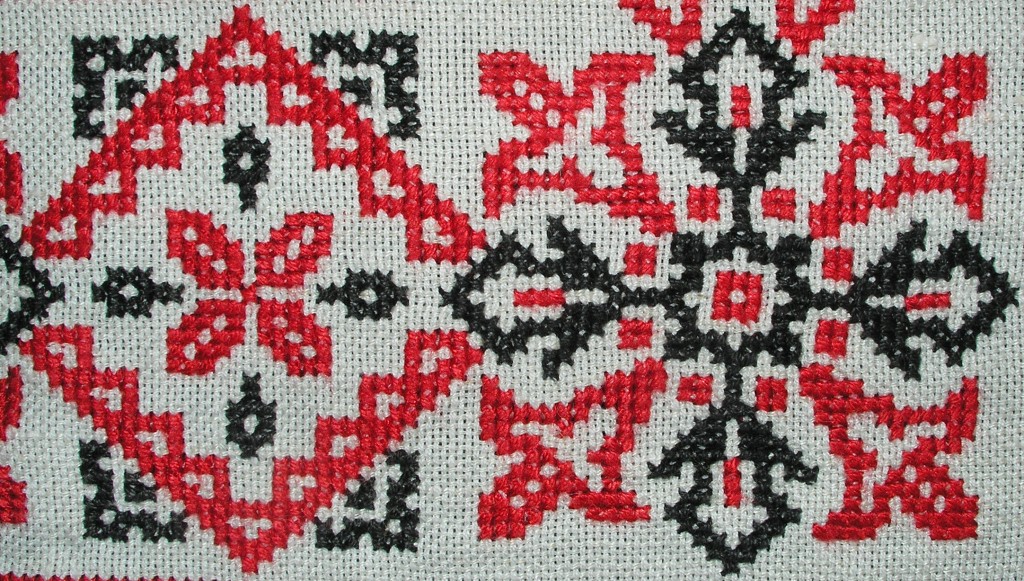
Cross stitch is one of the oldest forms of embroidery and cross stitch samplers like the one shown above have been found dating back to the 1600s! With colored thread, patience and hundreds (or even thousands) of little Xs, you can create just about any image you can imagine. It’s a great pastime, and you can make some pretty cool crafts with it.
What You Need
Starting to cross stitch is actually pretty simple. While there are plenty of cross stitch-specific things that you can purchase, you really only need a few things to get started:
- a needle with a wide hole – I use tapestry needles because they’re blunt so it won’t hurt when you accidentally stab yourself (not that I would ever do that…) and the holes are really wide and easy to thread. You can also use embroidery needles.
- embroidery floss – DMC is my personal favorite, as they are really good about each skein being the same shade. It’s also pretty affordable.
- cross stitch fabric – There are two main kinds of cross stitch fabric: Evenweave and Aida. I recommend starting with Aida, as it’s much simpler and easy to use. Evenweave is good for more old-fashioned stitches, but requires a different method which I’m not going to discuss here. Aida comes in different counts, which will change how large your Xs are. I recommend starting with 14 count Aida, as it’s the largest and easiest to use. Later, you may want to use 16 or even 18 count for more detailed (and time-consuming) patterns.
- scissors – any scissors will do. Many fabric stores sell tiny scissors that are excellent for cross stitch and other needlework, but for now your sewing or regular scissors will work just fine.
- a pattern – you can get free patterns online, or find a simple patterns at most hobby stores. There are several programs that can turn images into cross stitch patterns, but these are often overly complicated. If you want to design your own pattern, use graph paper to map out each area or print off a grid sheet to design your own pattern. For beginners, I recommend starting with a simple premade pattern.
If you decide that you really like cross stitch, you can purchase cardboard thread holders (shown above) that are designed specifically to hold embroidery thread, and a box to keep it all organized in. If you really get into cross stitch, you’ll be surprised at how quickly you’ll need something to put all your thread in!
Getting Started
So, you’ve got everything you need to start your awesome cross stitch! If you’re a nerd like me, it’s pretty exciting. But, before you can get started, you have to prep your thread!
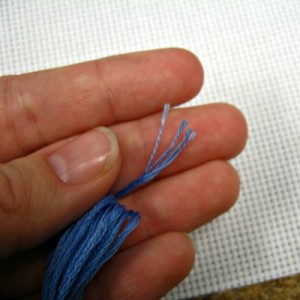
Embroidery floss comes in thick ropes that are actually made up of six smaller threads all wrapped together. Depending on whether you are using 14, 16 or 18 count Aida, you will want to split your thread into two lengths with 3 strands each (for 14 count) or three groups with 2 strands each (for 18 count). This will help make sure that your Xs aren’t thick and clunky looking. Whether you use two or three strands is partially a personal preference, but I would start with three and see how it looks. If your Xs look puffy and blobby, then lessen the number of strands.
Basic X Stitch
As you probably know, basic cross stitch is pretty much just a bunch of little Xs all in a row. Counted cross stitch involves several different colors which you can use to create an image. Here are the steps to make your basic cross stitch X:
At the end of the day, what direction you do your Xs (or where you start) doesn’t really make that much difference. What IS important is that you do every stitch the same so that the stitch on top is always going the same direction. It is a small detail, but it will make your creations look far more uniform and pretty.
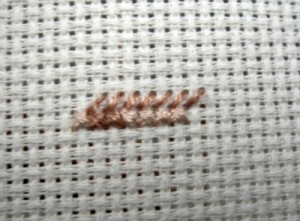
When doing a counted cross stitch pattern, you will come across large areas that are all the same color. When this happens, you have two options: you can continue doing individual Xs like normal, or you can do the whole row at the same time, taking it one step at a time (ie going left to right all the way across the row and then backtracking to cross over right to left) as shown in the image below. I tend to prefer this method as it involves only counting once!
More complicated patterns might involve half, 1/4 or 3/4 stitches to get a shaded effect that can be quite beautiful. I wouldn’t recommend starting with them, because the patterns are a little complicated. When you’re ready, keep in mind that half stitches involve crossing one way with one color, and then using another color to cross over top of that to make your X. 1/4 and 3/4 stitches involve pushing the needle through the center of where your X would be.
Ending A Color
Starting a cross stitch is easy: tie a knot and off you go. But, if you want to avoid having a million knots and a messy back to your needlework, there’s a trick to ending one color and starting with the next.
When you’ve finished with your color, flip your fabric over and slide the needle underneath several nearby stitches, pulling through tightly. Try and get at least three stitches to hold. Then, simply snip off the end of the thread. Voila! No knots, and it’s a secure hold.
If you are really trying to make your back look neat, you can start a new color with a similar method. Tie your thread in a knot on one end, slide it under several stitches. Once you have a few stitches set in the new color, turn the fabric over and snip off the ugly knot!
Backstitching
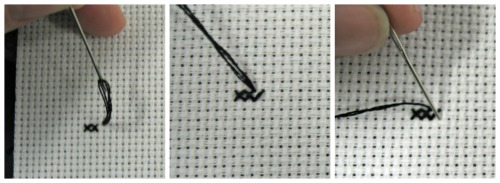
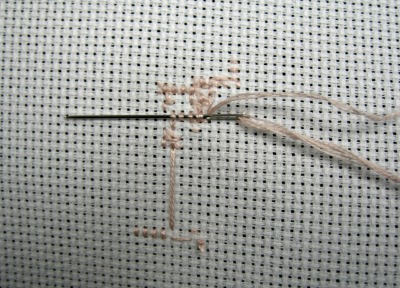
Backstitching is a way of outlining your images and is often used for words and lettering as well. Backstitching can be done with two or three strands of thread, depending on how thick you want it to be, and the method is actually pretty self-explanatory. Here are a couple of images showing how it’s done:
Basically, you work from the top down to get the cleanest line. This kind of stitch is probably the easiest to do. Keep in mind when doing backstitches, you want to pull it tight but not too tight or it will pucker and look bad. Alternatively, if it’s loose it will sag and look awful, so pay attention! Once you do a little bit of it, you’ll get a feel for how it should look.
French Knot
The french knot is the other basic staple stitch. Basically, what you’re doing is creating a little stack of loops all on top of each other to make a controlled little knot. French knots are used for decoration on a lot of patterns, so I wanted to include it.
Here are the steps, explained below:
- From the back of the fabric, push your needle up through the hole where you want the french knot. Then pull the thread away from you and cross the middle of your needle over the thread.
- Using a counter-clockwise motion, loop the thread around the needle, making sure that you wrap upwards, towards the tip of the needle. Each loop should be higher than the last. Do at least two loops.
- Keeping the loops on the needle, poke the tip back through the same hole you used to start the knot.
- With the needle in the hole a little ways, pull the loops until they are tight and are pressed against the fabric, at the end of the needle. The loops should be touching the fabric.
- Push the needle the rest of the way through the hole, carefully pulling the thread behind it. The thread should catch and tie your knot, which might have a hole in the middle similar to a little doughnut.
If your knot undid itself, you probably didn’t wrap the loops right. Take a look at the photo above, and be sure you’re wrapping towards the top of the needle, with the needle pointing away from the fabric.
If your knot is above the fabric, make sure you pull it tight in step 4, and be sure the loops are touching the fabric before you pull the needle through.
It takes a little bit of practice to get the knot right, but it isn’t super hard. Experiment with how many loops you need to make larger or smaller knots, and then adjust for your pattern. I recommend three loops for most needs.
Pattern Walkthrough
You can easily find hundreds of free patterns online, all with colors and varying levels of difficulty. There are many sites that sell patterns, and you can find starter kids at most craft stores and often in department stores that sell fabric.
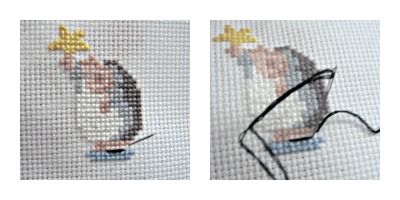
Click here to see my step-by-step walkthrough (with pictures) showing you how to read a cross stitch pattern and and how to sew this adorable little guy:




thank you so much for this! i have been cross stitching for a while but am never quite happy with my end results. i learned a couple of tricks here that i am sure will improve my results!!