Last Friday, I posted a brief introduction to the wonderful world of cross stitch. I have a passion for handmade crafts, and needlework in particular is something I’ve always enjoyed. Cross stitch is one of those super relaxing crafts that doesn’t require all that much thought and you can make just about anything.
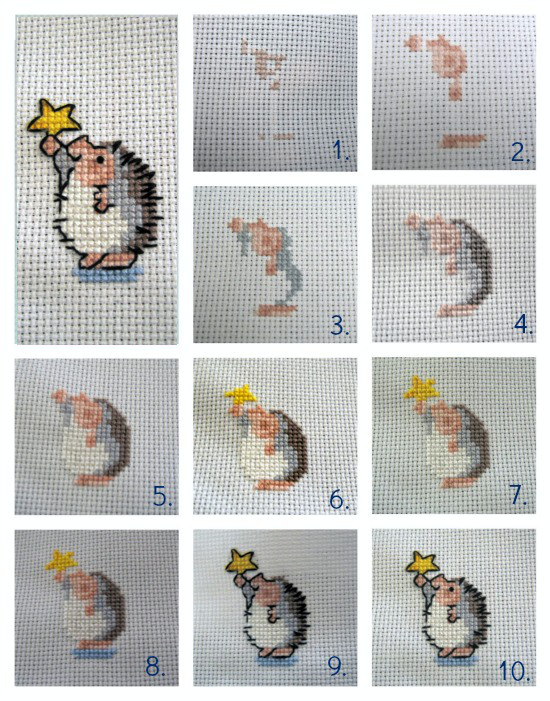
The above image is the pattern I’m going to walk you through today. It’s actually the first part of a homemade baby shower gift I’m working on, and once the little guy is born I intend to add additional stars above the hedgehog to represent his birth month and year. But, for now, this will work just fine.
As a reminder, if you are new to cross stitch, be sure to read through my beginner’s guide before you get started!
Reading the Pattern
There are dozens of free patterns available online, depending on what you want to make. For this project, I was looking for something with a woodland sort of theme and something cute for the baby. Here’s the pattern I found:
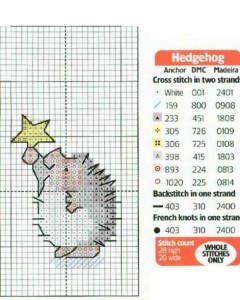
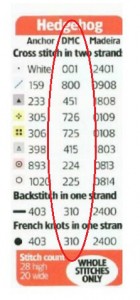
You might notice to the right of the pattern there’s a bunch of little rows of complicated-looking numbers and colors. That is the legend so you can pick the right color of thread for the right section. Most legends aren’t this complicated, but I thought this would give a good chance to explain how to read it. Don’t worry–it isn’t as complicated as it looks! At the top of the chart, you’ll see three words.
This is basically your key to reading this particular legend. Each column is listing the numbers for a different brand of thread. Pick whichever one matches the thread you’re going to use, and then just ignore all of the other numbers. I prefer DMC thread, so I used the middle chart.
DMC is probably the easiest to find, but double check your embroidery thread and make sure that you’re reading the right numbers! You can, of course, ignore these and make your pattern in whatever colors you want if you wish. Want a pink hedgehog for a little girl? Go for it! That’s half of the fun of cross stitch! As a side note, most patterns are listed in one thread type–again, DMC is very common.
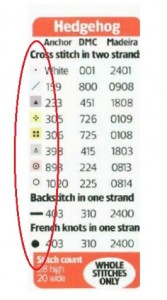
Now that you know which numbers you’re using, you’ll see to the far left a series of little boxes with shapes and colors.
This is to let you know how to read the actual pattern, and you should match those shapes with the thread number on the same line.
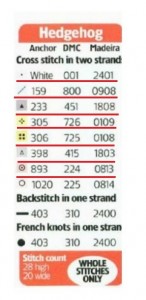
From there, it’s pretty similar to those old color-by-number books, except you’re using thread instead of paint to make a picture. Now that you have an idea of what all those numbers and colors mean, let’s look back at the pattern again:
See? Not as scary. Now, you might also notice that the grid isn’t uniform–there are darker lines forming larger boxes. Those big boxes are exactly ten stitches by ten stitches and are there to help you with counting and measuring. This is a very small pattern, so it doesn’t make much of a difference, but on larger patterns being able to skip 10 stitches at a time when counting is a great help!
These squares will also help you determine how large the pattern is. Count the height and width of the pattern and then divide that by the count of your fabric. For example, this pattern is 20 stitches wide by 28 stitches high and I’m using 14 count Aida. So therefore, I’d calculate the height and length in inches like this:
20 stitches wide ÷ 14 count aida = 1.42 inches wide
28 stitches tall ÷ 14 count aida = 2 inches tall
Now that you know how big in inches this little guy is, measure your fabric to decide where to put him and you’re ready to start!
Step by Step
To get started, pick a color to begin. I usually start with a color at or near the bottom and then work my way up. Some people start with the colors that are the most prevalent and then build the picture around it, or start in the middle and work out from there. But really, it’s whatever order makes the most sense to you.
Here’s how I stitched this little guy, step-by-step:
As you can see, it’s pretty simple. Take things one color at a time, and count each section as you go. As a side note, the pattern actually calls to use one strand for the backstitch and the french knot, but I opted to use two instead to give him a chunky, more cartoony look. It seemed appropriate for a nursery, but you can do it however you like. One strand would likely look far more clean.
The cool thing about cross stitch patterns is that you can do whatever you want. The limits are pretty much your imagination and creativity, so don’t feel like you have to follow the pattern exactly. If you don’t like a color–change it! If it looks bad, you can always unstitch it.
Now What?
So, you’ve got the basics, and you have your pattern. What’s the next step? Well, using it, of course! Once you have your first cross stitch done, you can frame it or sew it into a cute country-style pillow or do just about anything you can think of. Personally, I’m a huge fan of framing needlework, as it stays prettier for far longer, and might even become an heirloom someday.
If you have any additional questions, feel free to leave me a comment below or join us in the forums for more discussion! And, of course, happy stitching everyone!!


How adorable, I have to stitch this little guy!! Thanks for the pattern! 🙂