 A couple of weeks ago we had our first adventure in sausage making, this process was not nearly as hard as I would have thought it would be, however I do have a small disclaimer with this tutorial. I am not a sausage making expert, although I have canned, dried, preserved and cooked for many years, sausage making is one of the things I had never tried until this year. Still I thought a good step by step of what we did would be in order.
The desire to make our own sausage was the same as what most people would have, the amount of additives in store bought sausage was something we would like to avoid, plus we had extra chickens that we would not use for BBQ so thought that this would be the ideal way to use them. Chicken is affordable and when raised yourself is free of all of the additives and chemicals that commercial chicken and sausage is full of.
The recipe we used was one that was adapted from a recipe we found on the Spicy Sausage; this site has a lot of good sausage recipes for all types of meats.
What You Will Need to Make Chicken Sausage
Before we get started with the actual tutorial there are some things you will need if you want to make sausage.
Grinder
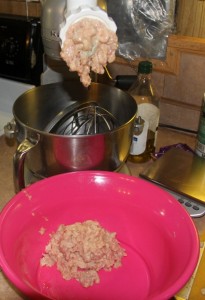 The first and most important tool is the grinder, there are several different ways to go on this, I have a kitchen aid mixer and bought the grinder attachment for it. This worked very well, and I had no issues with it. The grinder attachment costs less than $50 and attaches to the front of your kitchen aid. For me it was the most affordable way to do this, without grinding it by hand something I was not up for.
If you do not have a kitchen aid mixer then you may want to consider getting a grinder, you can get hand grinders for a reasonable price, or if you think you will be doing a lot of grinding and can afford to, there are a lot of nice electric grinders on the market that come highly recommended by sausage experts. If you opt for a hand grinder they work great and are more affordable, but do required a lot of muscle so make sure you have family on hand to help.
Sausage Stuffer
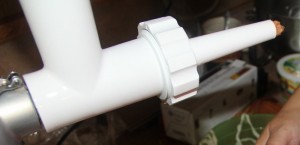 We made both sausage patties and links so we also needed to buy a sausage stuffer for the links. If you buy the kitchen Aid grinder you can buy the optional stuffer attachment for just a bit more money. While a lot of people complain that it does not work very well, I used it with little problem, and as you will see further down the page it worked just fine.
There are commercial grade sausage stuffers available on Amazon, if you plan to make a lot of sausage they may be a good investment, I will never make enough to make it worth it, at least not in the immediate future.
Scale
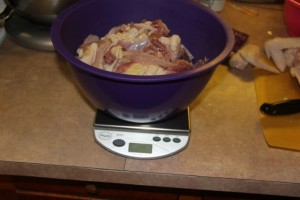
A scale is not an essential item but I found it very useful to ensure my measurements were accurate.
Other tools you will need are a decent knife for boning the chicken, you can use boneless thighs if you are not growing your own chickens but we used our own chickens so a sharp knife was essential, boning raw chicken is impossible without one.
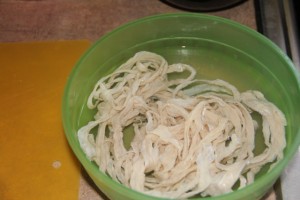 You will also need casings for your sausage, there are a few types, we used hog casings which are perfect for kielbasa style sausage. If you want breakfast links you will want to buy lamb casings. You can also get other types of casings including ones that are not made from intestines, but it is generally agreed that these two casing are the best.
NOTE: I read in several places that you should buy casings fresh and not freeze them, I found this to be the case, I bought frozen casings locally because they were convenient and cheap and they were torn before I could even use them and tore more very easily. Next time I will buy fresh casings on the Internet to do my sausage. This was the one of the only big mistakes I made with this sausage making session. Fresh casings keep well, and can be shipped; they are worth the extra effort to make sure you do not have problems with the casing tearing when stuffing or during cooking.
Finally be sure to have some sort of kitchen twine on hand you will need this to tie the ends of the sausage casing once they are stuffed.
Making the Sausage
Ingredients
5lbs of chicken with the fat and skin(I used 4 small chickens to get 5 lbs of meat to grind not including the wings which were frozen for another meal)
12 Oz of Onions sliced
7 oz of sun dried tomatoes – reconstituted and rinsed
1 Cup of Pepper Jack Cheese shredded – OPTIONAL (was not included in the original recipe but added a nice taste)
2 T Coriander Seed
2 T Fennel Seed
3 T Rosemary(I used fresh and minced it if using dried drop to 2T )
3 T Oregano(also used fresh if using dried drop to 2T)
1T Celery Seed
1T Thyme
1T Sea Salt
Prepare the Casings
 Be sure to follow the instructions on the package if there are any, and if not, I soaked my casings overnight changing out the water frequently. Casings are packed in salt so you want to make sure they are well rinsed. Soaking will make them pliable enough to work with.
Debone and Grind the Chicken
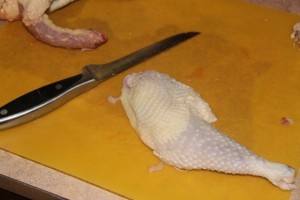 Our sausage making session started with boning the chicken, I chilled it beforehand because it made it easier to grind, however I recommend that you chill it as you debone it and let it chill or partially freeze before you start grinding. By the time my chicken was all deboned it was no longer chilled and I worried about having it out too long, next time I will put it in the freezer as I debone it to ensure that it is the perfect consistency for grinding. Make sure to keep the skin and extra fat, the sausage needs it and chicken tends to be too lean for sausage making without it.
Once the chicken is all deboned (I tossed all the carcasses in a soup pot and made chicken stock with them) and chilled it is time to grind it. This is the most time consuming part of the process, I also found with my kitchen aid grinder attachment that I had to take it apart periodically and remove all the tendons and bits that did not grind well, doing so sped up the grinding process.
I used the plate with the largest holes for my sausage, I tried both and liked the texture of that one the best, you will need to experiment a bit with your grinder to see what gives you the best results.
Once I had the Chicken all ground up I sent the onion and Tomatoes through the grinder as well, be sure that the tomatoes are well drained before doing so or it will add extra liquid to the sausage it did not really need.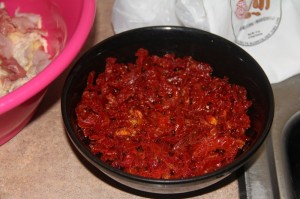
I then used my kitchen aid mixer bowl and paddle to mix the chicken, tomatoes, onion, cheese and spices together. I opted to chill my sausage at this point, it was a warm day and the sausage was feeling very mushy, chilling it in the freezer gave it a much nicer consistency and made it easier to work with.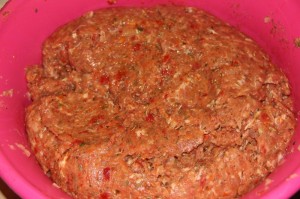
Stuffing the Sausage
Half the sausage I made into patties, the other half I chose to stuff. Stuffing was not as hard as I thought it would be but neither did my sausages turn out perfect. I am certain that part of the problem came with the fact that I bought my casings pre-frozen from the local grocer, this I have read can cause them to tear easily, and tear is exactly what these casings did. I did manage to find enough of them to stuff some really nice looking sausage, but much of the casings were torn before I ever fed them onto the sausage stuffer. Next time I will buy better quality casings for making sausage.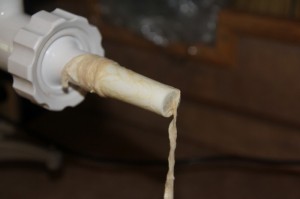
Casings should be well rehydrated before putting them on the stuffer; we greased the stuffer to ensure that the casings slid on easily. Once the full length of casing is on the stuffer we tied the casing end securely to keep the sausage in.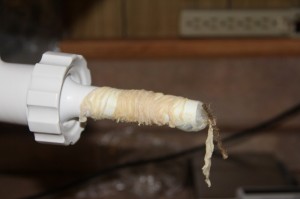
We then slowly fed the ground up sausage into the casing being careful not to overfill and leave enough room to twist the sausages when we were done. Use something with a sharp point to pierce the casing if you have large air bubbles but if you feed it slowly this should not be a problem.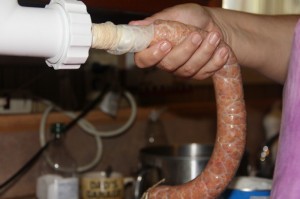
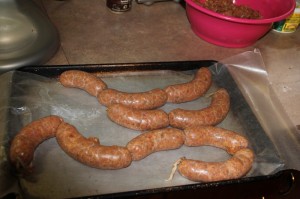
Leave enough of the casing at the end to twist and tie, then twist the casings to make each individual sausage link. I then flash froze them on a cookie sheet.
Finally we tried a few of our new sausages out, they looked great, tasted even better and I called this new project a complete success. I will do it again, but will make a few adjustments next time including buying better quality casings.

Do you like the kitchen Ade machine? I find there attachments to be kind of cheap. I think it is better to by one machine for each task e.g. a grinder and a stuffer solely devoted to carrying out those tasks, rather than a machine with attachments.
I actually wore my kitchen aid mixer out using the meat grinder attachment. Had to throw it away – gears inside were worn out. It sounded like it was laboring even with just liquid in a mixing bowl. I have since bought a separate grinder for the hard work. Not sure when I’ll be able to afford a new Kitchen Aide mixer. If you grind a lot of your own meat, I recommend a stand alone grinder.
I have had a Kitchen aid mixer for more than 25 years. It’s been in use weekly for one thing or another and I’m sure it has ground many hundreds of pounds of meat. Most likely the models they sell today are not as well built as the older ones.
Now I’m hungry. 🙂 I was debating getting a meat grinder and making sausage, and your post was really helpful for me to see the whole process. I love getting back to basics, and I may just jump in and try making sausage this after reading your post. (Supermarket sausage always worries me, so it’s nice to see how practical it can be to make your own.)
Hello Dara, greetings from Scotland – 11th March 2014
Recently purchased a kitchen grinder and sausagemaker and after reading the recipe I can’t wait to get
started. After the recent revelations regarding horsemeat in supermarket foods, which is really unknown
in Scotland, my family are suspicious of foods unless I make them myself from scratch, hence my decision
to try making my own sausages (without red meat). We eat a lot of chicken, turkey, eggs, vegetables and
herbs, so that should set me off on my sausagemaking. Hope I don’t make too much of mess. Ha.Ha. best wishes to you
I’;ll make them all into
to put 1 cupfull of pepper.and 12,oz of onions to 5lb of sausages is ridiculous , and would be impossible to eat. please alter the above chicken sausage recipe.
Looks like 1 cup pepper jack cheese, not one cup of pepper.
Pepper Jack is a CHEESE!!!!
Hello ! look again its 1 cup of pepper jack cheeeeesse! JACK!
I make a great deal of sausage each year (most recently was rabbit sausage).
I think I maybe able to offer a little helpful advice. You’re recipe looks very tasty, and I plan to give it a try.
The tip is regarding your casings. You explained that you soak your sausages overnight, then later mentioned that you had an issue with them splitting. If using salted casings, I always soak in warm-hot water for about 10-15 minutes, then rinse the inside with the faucet (basically run a little water through each to rinse the inside). I then put them in cool water and begin stuffing immediately (no further waiting needed).
The casings will be very pliable, and you will have no unwanted taste in the final product. Additionally I find that not “water logging” them helps the finished sausage tend to have a better “snap” when grilled. I also have noted that when I do an “all day” sausage making, if I have the casings soaking too long, the last few start to split easily.
Hope this helps.
When butchering birds do u included the livers and gizards
I wanted to add spinach, does it matter if spinach is raw or cooked?
Bought sausage making equipment recently. Would like to start chicken sausage making as a business. Kindly help with recipes which are affordable for urban areas.