This is a continuation of my Pressure Canning Basics Article You can find the first article in the series Here
 Once you have chosen the right pressure canner it is time to consider what you will use it for. For our family the idea was to grow as much of our own food as possible and preserving it was a must. I have pressured canned for years, but this year took on a new urgency as I wanted to make sure we had plenty of food for the winter.
You may have already thought a great deal about your reasons to get a canner and what you want to use it to accomplish but to make the most out of your investment it is important to consider how you can use it to achieve your goals. Consider how much food you want to can, where you will get the food, and how you will store it.
For most people having a pressure canner usually means they want to store their own food. It can be food they have grown and raised themselves, or it can be food that has been given to them by family or friends or that they have purchased at the local markets in their town. There are many advantages to having a pressure canner that I have already covered in my 10 reasons to Give Pressure Canning a Try article.
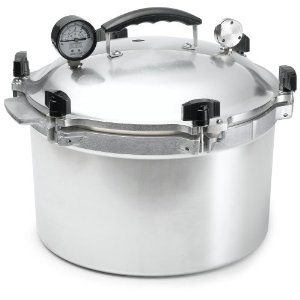
You should start by unboxing and carefully examining your canner, check the seal if you buy one with a rubber seal and make sure that the vents are all clear. Wash everything with soap and water thorough before using it for the first time.
Getting a few books as well as finding a few reliable websites online can help you to read up on proper canning techniques as well as give you tested recipes to get started with, I have a list of recommended books on this post. These recipes have been thoroughly tested by canning experts to ensure that they are completely safe and work properly. Over time you will get an idea of what is safe and not safe where pressure canning is concerned, and then you will be able to start using other recipes you find provided they follow the guidelines for safe canning.
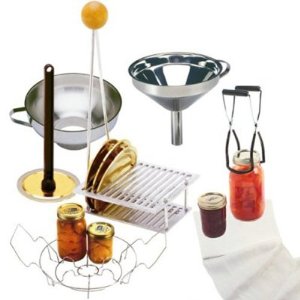
Other Tools You Will Need
 If you have canned before you will likely have all the tools you already need to pressure can, such as an scale for weighing produce, a canning funnel, a pair of canning tongs, a spatula for removing air as well as jars, rings and lids.
Be sure that you check jars for nicks or cracks, even new jars before filling them with food. It does happen that a jar will get a nick in the rim during manufacturing or while you are washing the jars. This will keep the jar from sealing properly and can let air into the jar, which can create a breeding ground for botulism.
Guidelines for Safe Canning
- Be sure you understand what high acid and low acid foods are and why low acid foods need to be canned in a pressure cook. Never can these foods in a water bath canner as the canned foods can harbor food born bacteria.
- Only use fresh produce that is at the peak of its freshness. Never use produce that is spoiling or old, not only can this give you an inferior product but it also can increase the risk of food born bacteria that might cause illness.
- Pay close attention to the pressure setting you should use for each type of food. It varies depending on the type of food, the size of the pieces of food and also on your altitude. Altitudes over 2000 feet are almost always processed at 15 pounds.
- Also pay close attention to the time that you process your foods. The time starts after the canner has reached the right pressure and will also vary depending on the food, the thickness of the liquid, the size of the food pieces and the size of the jar.
- Keep in mind that recipes are tested thoroughly to ensure safety so it is important especially when you are first starting out to never adjust recipes, pressure or time of the recipes you use. As you become more familiar with the process you will have a bit more freedom to adjust recipes, but you must know how to adjust your processing times and other factors to accommodate these changes. Some things can be safely adjusted such as certain seasonings, but be sure what you are doing is safe before you do it.
- Only use Canning jars and lids, and make sure that you replace your lids every time you can, unless you are using a reusable lid such as the Tattler lids. Tattler lids cost a bit more, but can save you money in the long run since you won’t have to buy lids every year.
- Be sure to remove any excess air from the jars with a canning spatula, since one of the tasks of pressure canning is to remove all the air from jars during processing this step is an often forgotten but important step to take.
- Always make sure to check the size and quantity of the food you are using careful. Purchase a scale for weighing items that are canned by the pound. While this is not particularly important if you are canning a single ingredient such as green beans, if you plan to can a recipe with multiple ingredients it is important to stick to the recipe. Things such as the size of the food pieces and the density of the food or liquid can make a difference in the processing time and the safety of the canning process.
- It is always safest to follow recipes from trusted sources when using a pressure canner to start out with, this way you know you are getting a recipe that have been carefully tested for safety.
- Always wash jars and keep them filled with hot water while waiting to fill them with food, I keep mine in a sink of soapy hot water until right before I use them.
- Finally be sure to careful check jars after they come out of the pressure canner. It is important to remove the rings as they are not needed after the canning process is completed and can mask signs of spoilage such as a bulging lid or leakage. Wash the rims with a hot soapy rag to wash off any spillage and then label your jars with the date.
- Many experts also suggest cooking foods for a certain time to ensure the safety of your food. I normally boil all foods for about 7 to 10 minutes before using. If I am using them in a soup or stew I do not do this, I only take this extra step if this is the only time I am going to cook the food in question.
- It is important to check for spoilage before using canned good, any jar that has a bulging lid, air bubbles, funny color or odor or leakage at the seal should be disposed of properly by boiling the jar, lid and food and disposing of it. Failure to do so could cause kids or pets to come in contact with and become ill.
A Final Word
Be sure to read up on using your pressure canner, our next article in this series will go into a step by step of how to use your pressure canner to help get you started. Read books and be sure to read through your canner’s manual thoroughly. The key is to have a good understanding of the steps before you get started, to ensure that not only does your canning go smoothly but that you carefully follow all the safety procedures for canning safe food for your family to eat year around.

Pressure canning articles by oldfashionedfamilies.com are awesome! Thanks for the invaluable info. I have ordered my All American canner (10-qt) and I am committed to giving canning a try. I chose this canner because of it’s obvious quality, ease of use, safety features, and smaller size for a household of only 1. I believe for the extra features, the price is fair. I have actually seen these models still working from 50 yrs ago on ebay! Your educated documentation will ensure my success in canning! Thanks