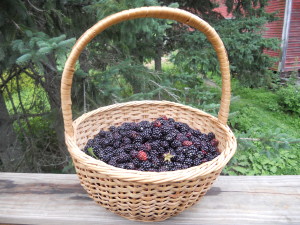
I have always been something of a fruit nut, but my absolute favorite has to be berries. It doesn’t really matter what kind–cherries, blueberries, strawberries, blackberries, raspberries–they are so versatile I absolutely love all of them. We always have berries in the house in the summers, and I do my best to try and freeze some to get through the cool winters.
So, no matter what berry you are freezing, here are some steps to getting the most out of the best fruits nature has to offer:
- Always pick at the height of the season when they are as ripe as they’ll ever be.
- Wash thoroughly to get rid of any bugs, dirt or pesticides
- If applicable, remove any stems or pits from the berries. You may want to dice the berries if you’re using large strawberries. This isn’t necessary, but recommended for ease of use later.
- Inspect fruit for bruised, rotten or brown spots and remove
- Find a baking sheet large enough to fit in your freezer and spread the berries in a single layer. Make sure none are overlapping.
- Place the baking sheet in the freezer and leave, uncovered, overnight. Do not leave for more than a day or you run the risk of freezerburn!
- Label freezer bags with the date and type of berry
- Remove berries with a spatula and place in freezer bags. Seal tightly, removing as much air as possible.
- Use within 6 months for best results
Voila! Perfect berries. The best thing about using this method is that the berries don’t freeze together in a lump so you can pull out a handful to use as necessary. They go great in salads or pastries, as snacks or added to smoothies. I’ve also sprinkled them over ice cream or oatmeal or even added them to a saucepan with some juice and a touch of sugar to make a homemade berry syrup for my pancakes. The possibilities are endless!
What do you do with your frozen berries? Share with me in the comments!


Leave a Reply